
If the IP camera was connected to the POE switch, you should be able to access and upgrade that camera directly via the camera IP address. The following instructions DO NOT apply.
If the camera is connected to the NVR directly via any of the POE ports, The following instructions DO NOT apply if your NVR menu likes this, you are still able to access and upgrade the IP cameras directly via their IP addresses.
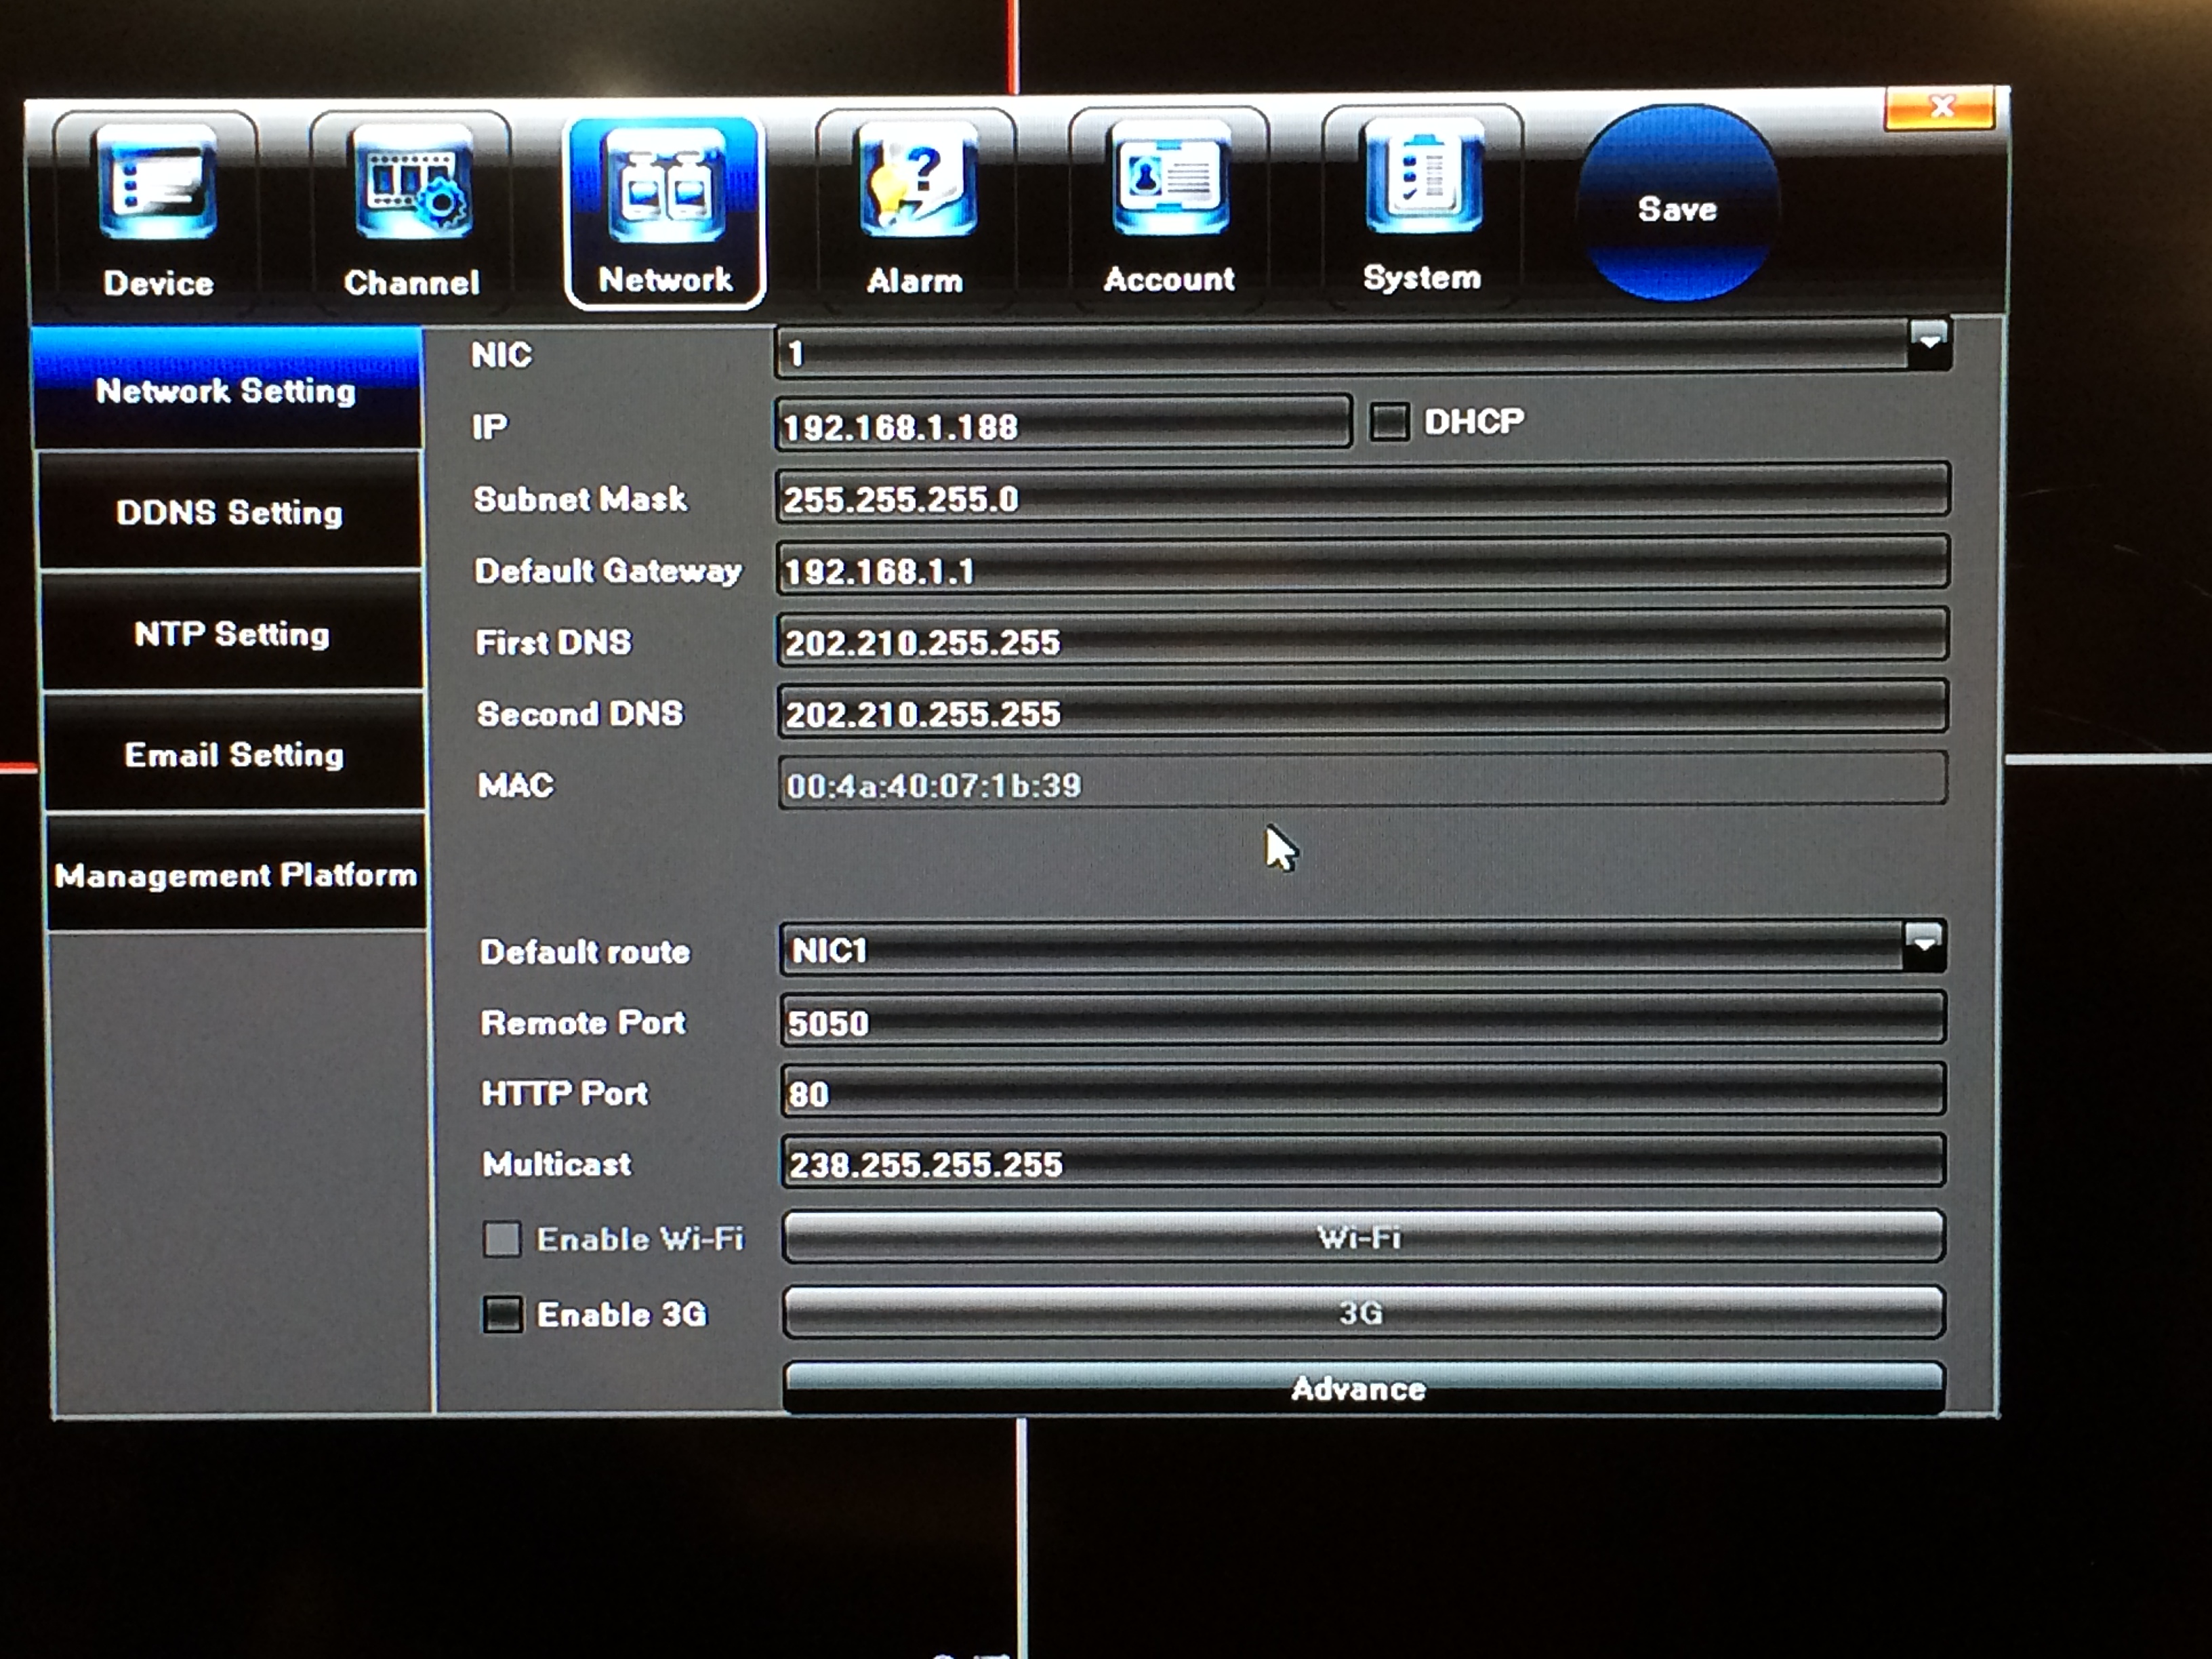
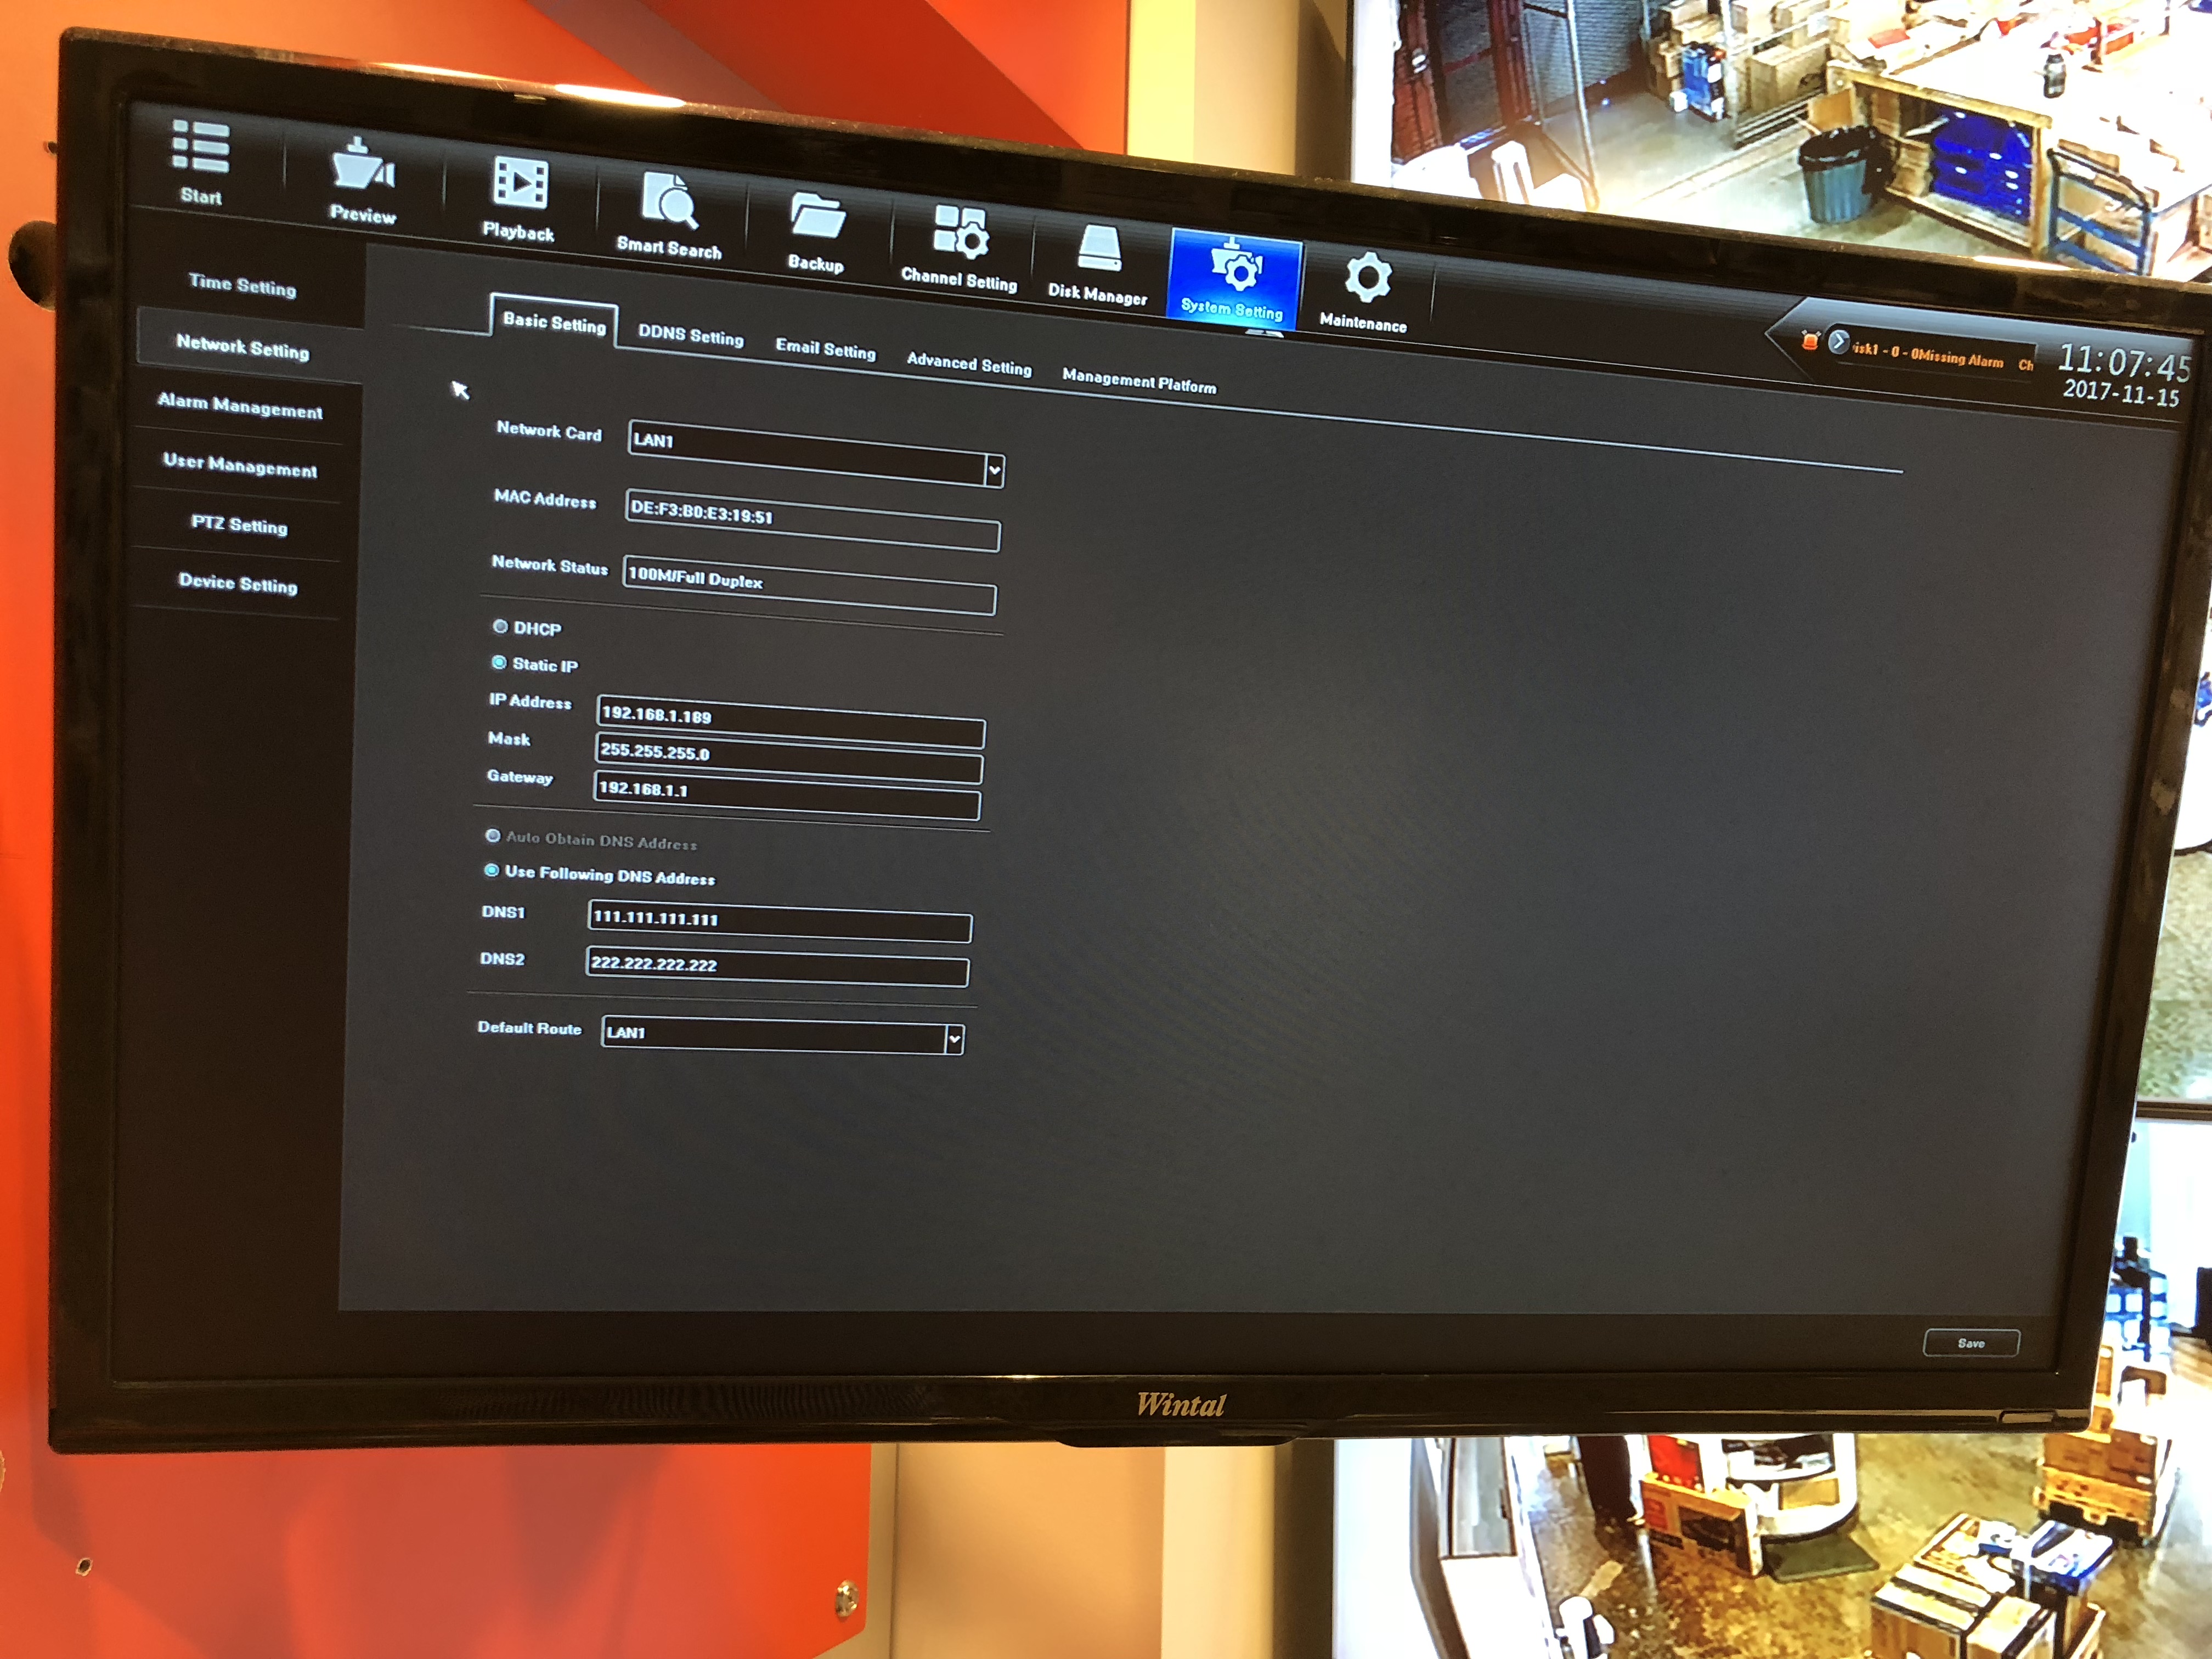
The following instructions apply ONLY when the NVR has two network cards built in. which are the most recent of the DOSS IQ 4K series, 8ch or 16ch. The NVR menu network setting likes this:
What you will need?
- Correct IP camera firmware;
- A laptop or a PC with an RJ45 network connection can access at the back of the NVR;
- The RJ45 network patch lead, cat5 or cat6;
- USB-RJ45 adaptor if the laptop does not have the RJ45 connection. https://www.radioparts.com.au/product/43151245/uprs2-usb2-ethernet-adaptor-usb-a-plug-to-rj45-socket-lan-usb-a-plug-to-rj45-socket-lan?
Preparation before the upgrade
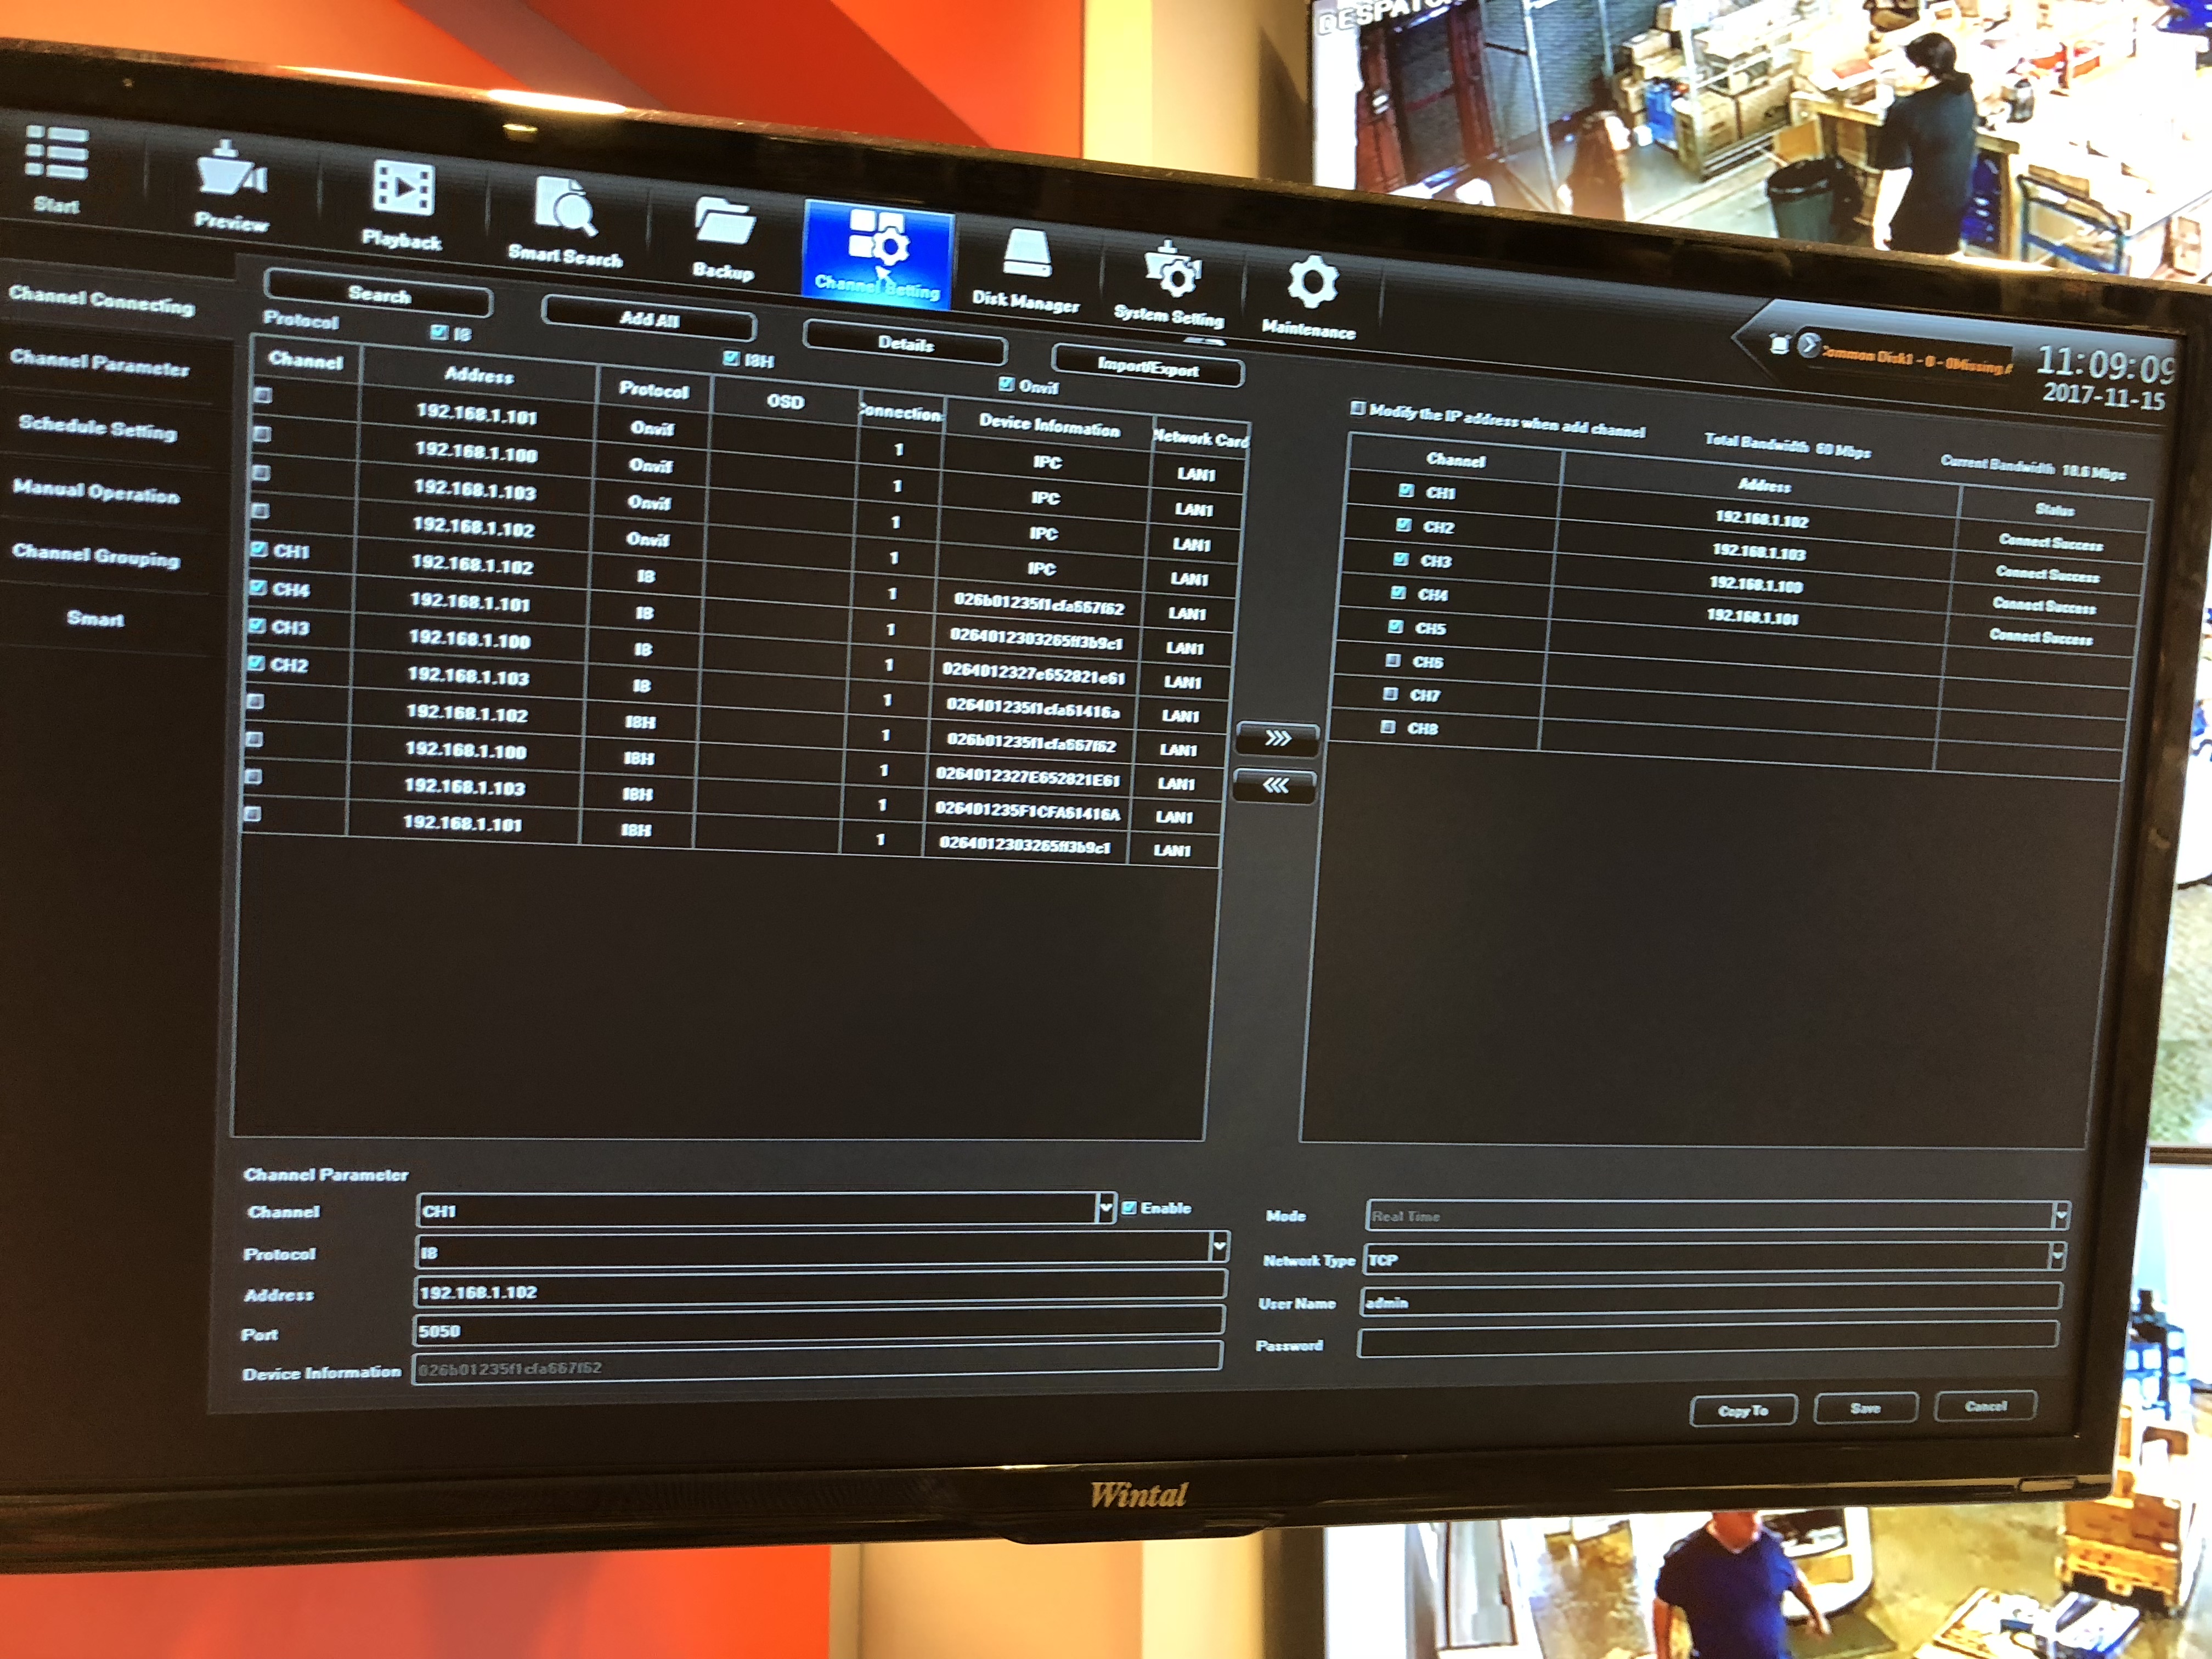
- Write down the Channel number and IP address of the camera to be upgraded. You can find this information from the Channel connection under the Channel setting menu. Refer to the image below, you will see all the successfully connected camera Ip addresses from that screen, however, your IP address will like 192.168.2.xxx or 10.0.2.xxx. (the number 2 here means those cameras are sitting on subnet 2, not like the NVR which is sitting on subnet 1, 192.168.1.xxx, or 10.0.1.xxx)
- Write down the port number of the IP camera to be upgraded, there is a mark at the back of the NVR RJ45 sockets, NOT the LAN port; If you have to unplug any of the IP cameras, make sure you do not unplug this one!
- Be aware of the IP address range that has been used, and create a new IP address, which is different from those IP cameras, you will need this for your laptop later on.
- Download or copy the firmware to the laptop or PC.
For example, you have connected CH1=192.168.2.189, CH2=192.168.2.190, CH3=192.168.2.191, CH4=192.168.2.192, the one that needs an upgrade is on CH1 and socket 1, and the IP address is 192.168.2.189, you can create a new IP address like 192.168.2.195 for your laptop, the IP address is not used by any of the cameras, and write it down the new IP address.
Connection Instructions
Part 1 on the Laptop preparation
The following instruction is based on Windows 10 on a laptop, which may be slightly different from your Laptop/PC.
BE CAREFUL! whatever you have changed on your laptop settings, you need to reverse it back after the firmware upgrade! and there will be no internet access on your laptop during the update.
Tips: Take some photos of the network settings from your smartphone before you change anything on your laptop.
- Disable the laptop wifi
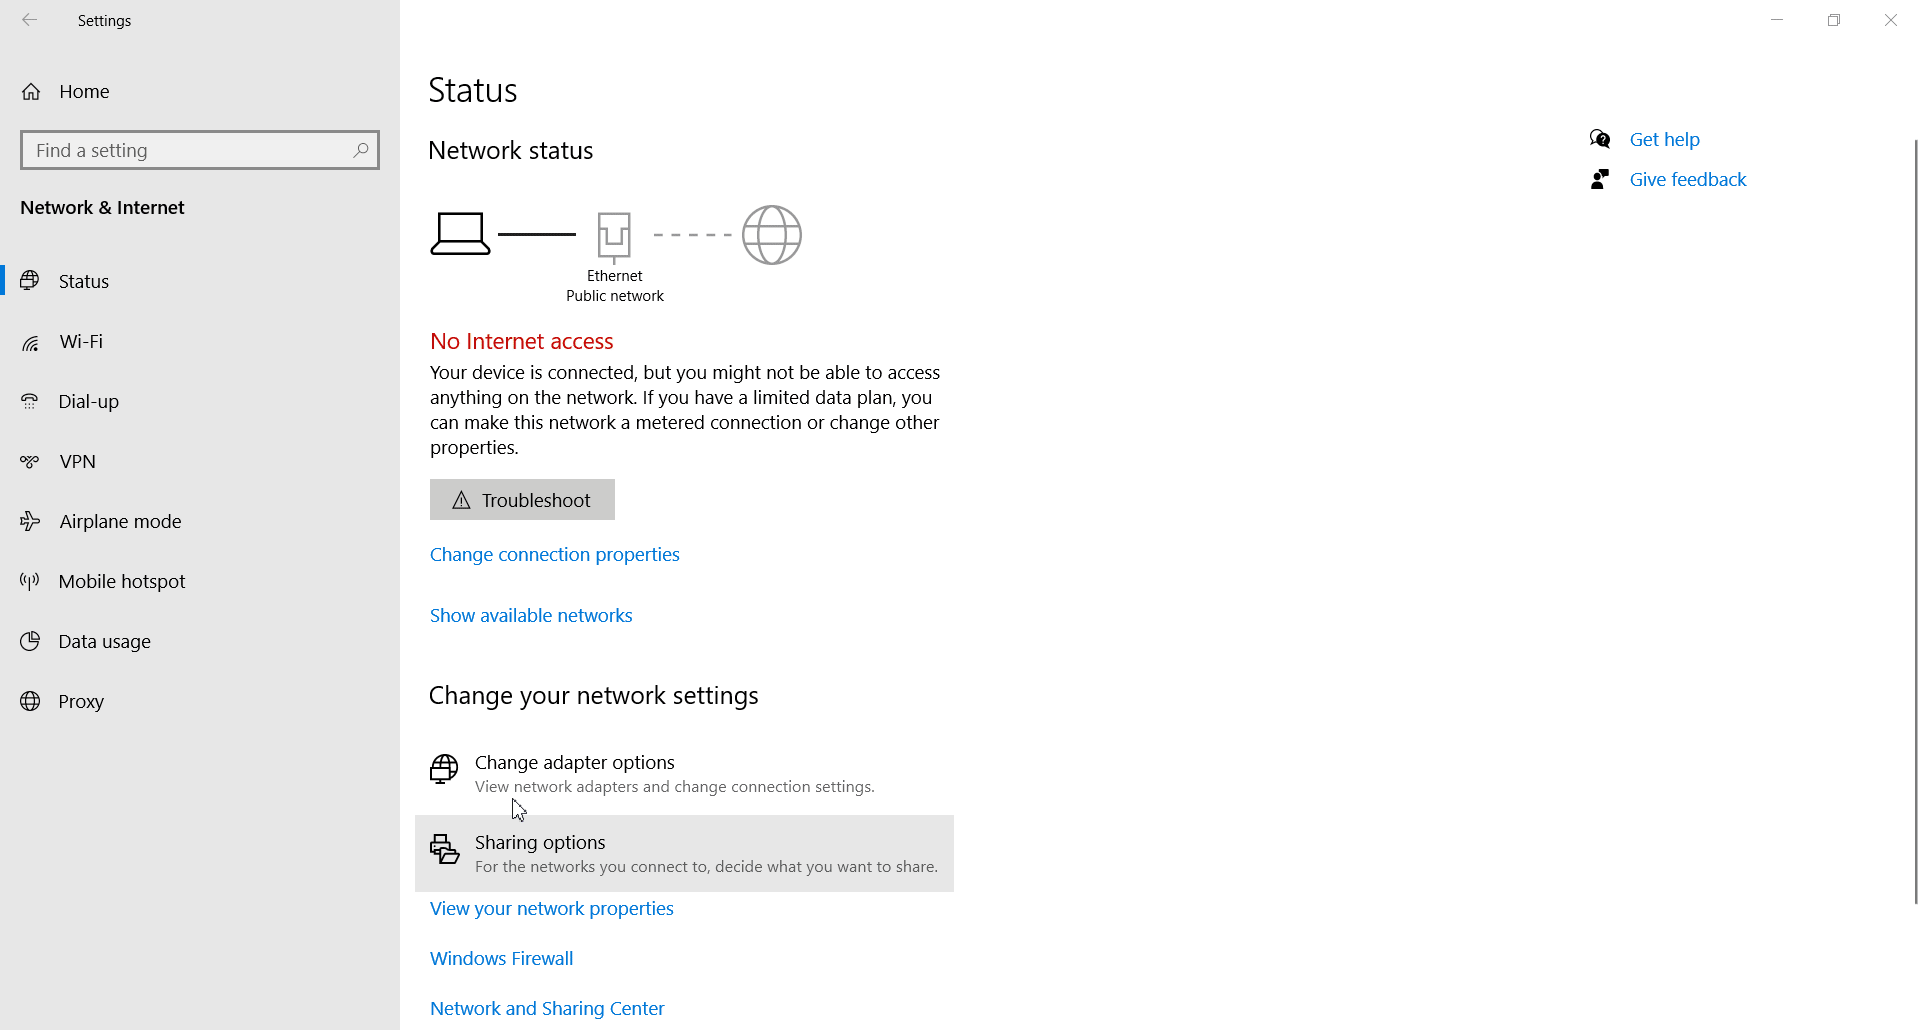
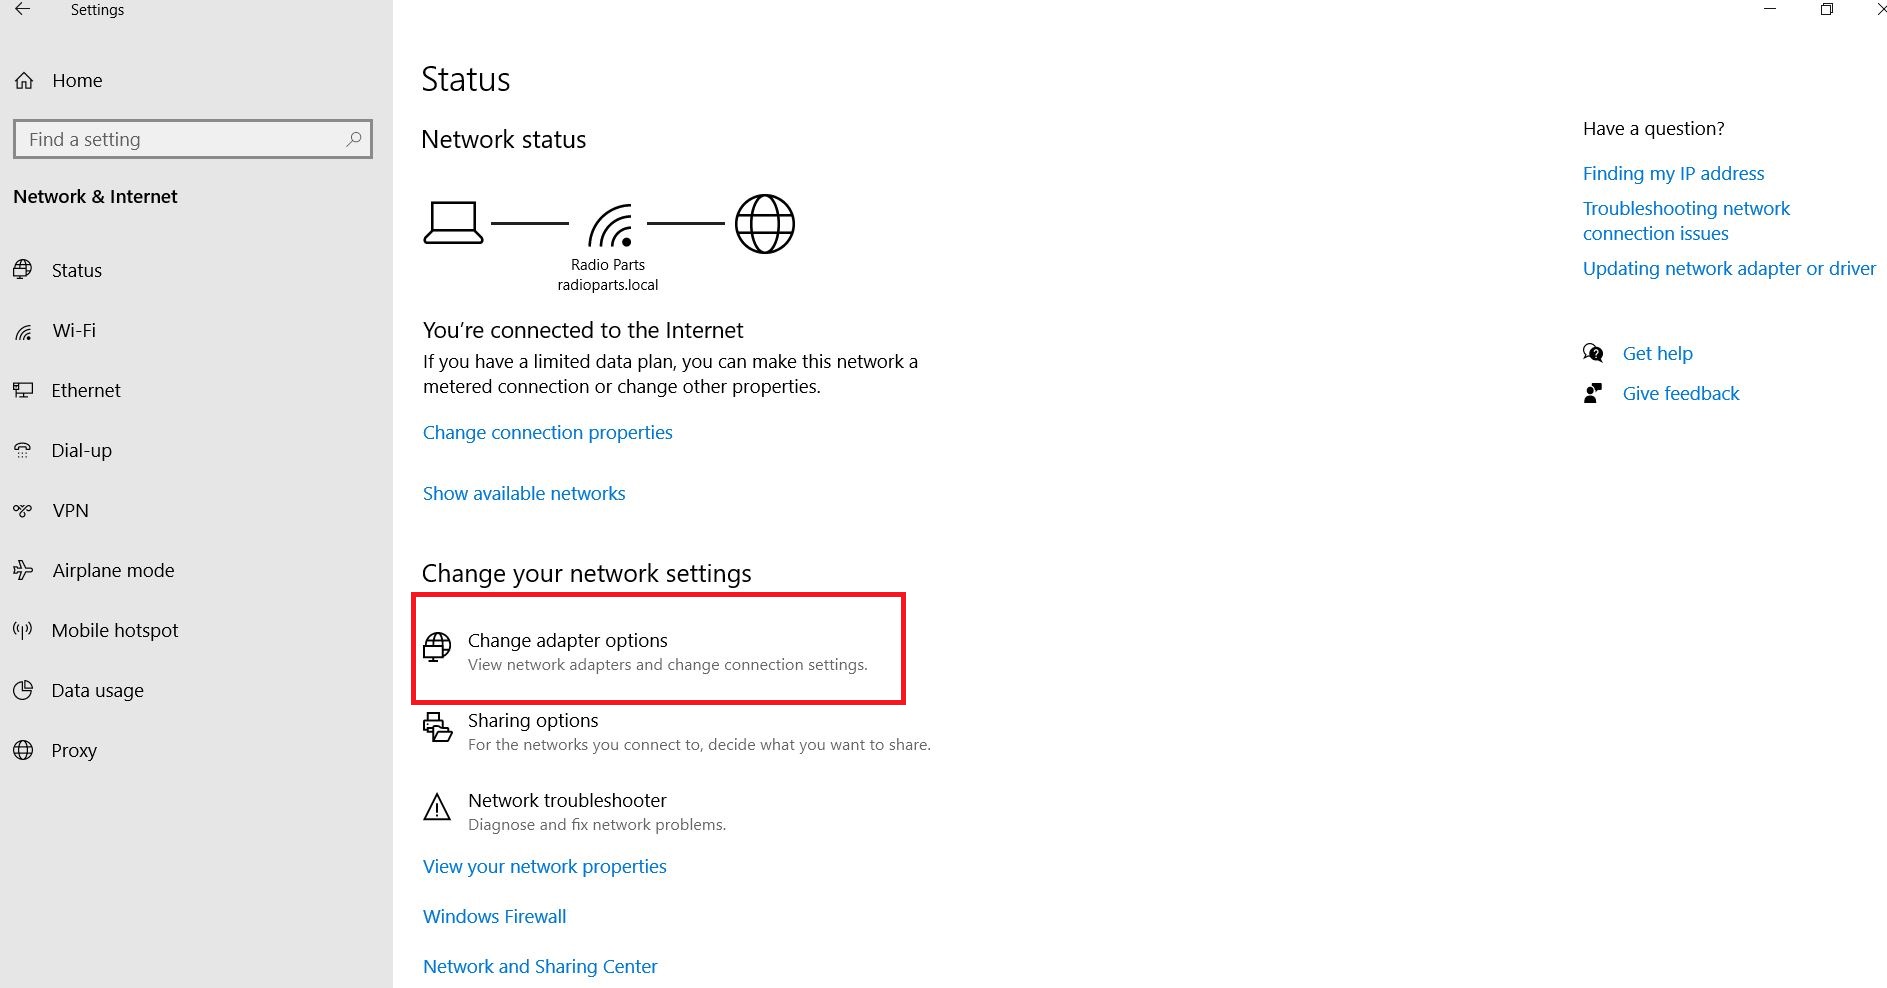
- Go to Windows setting, then Network and Internet,
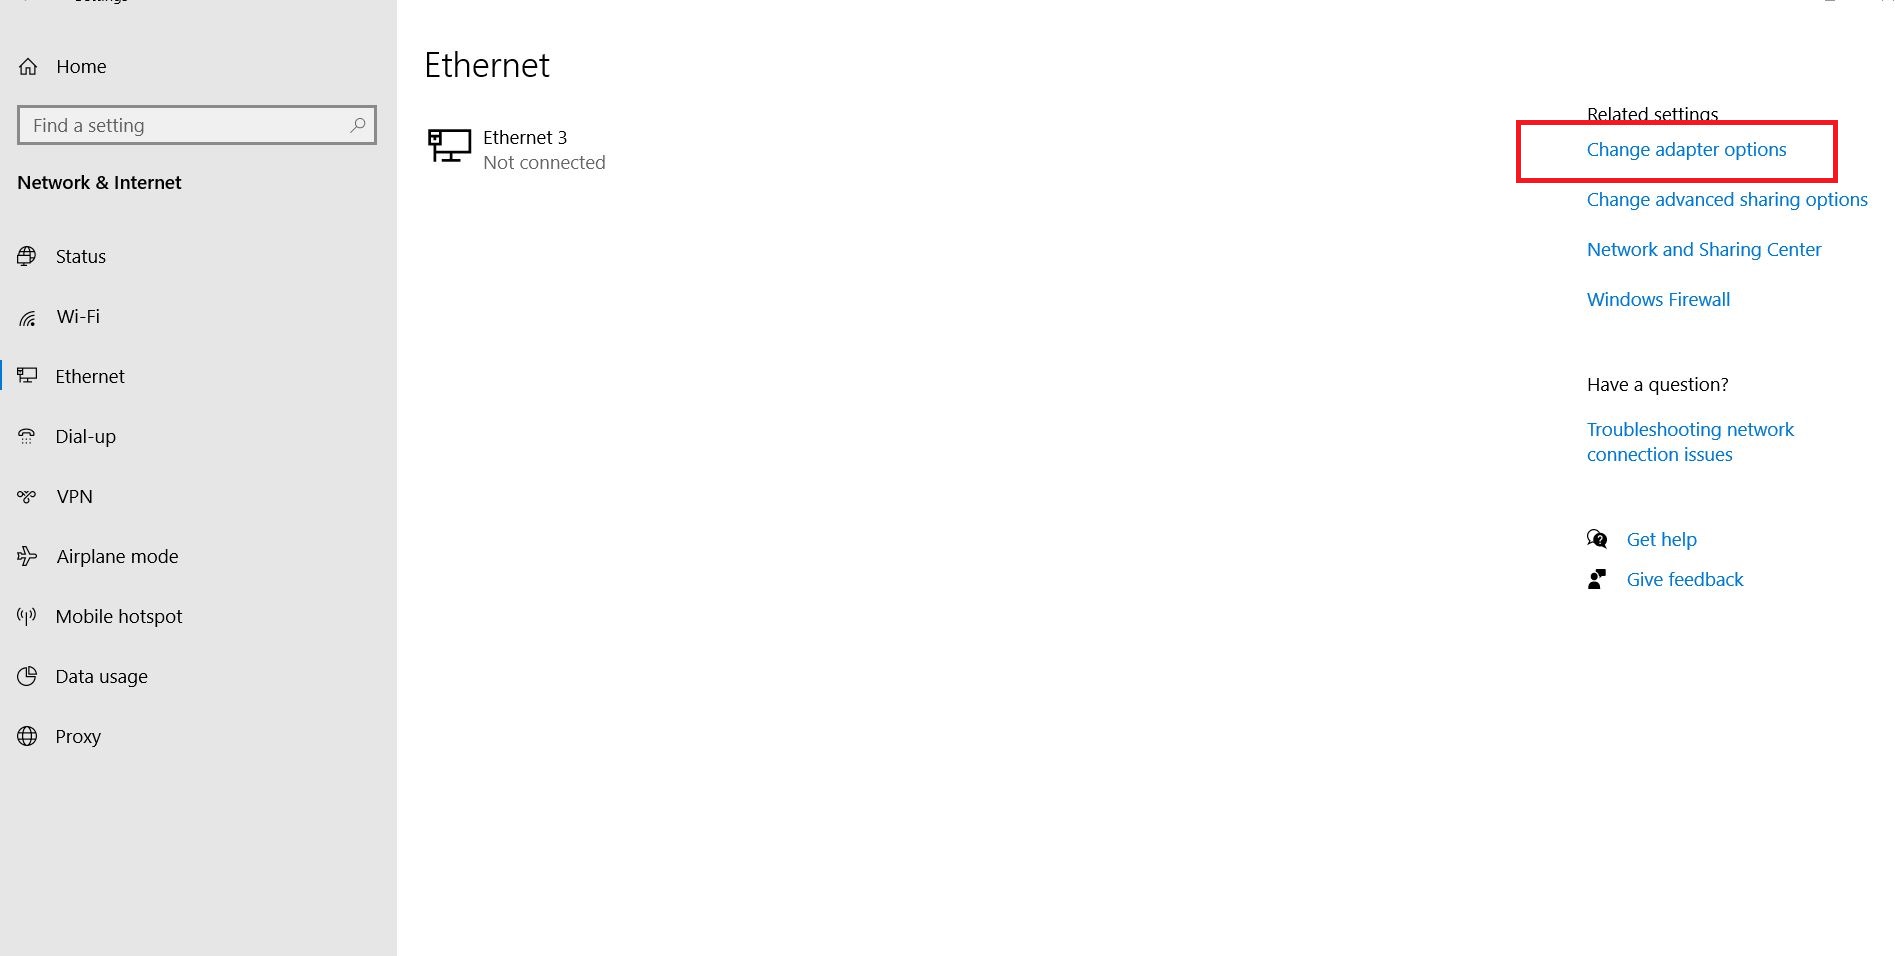
- Select the Ethernet, change the adaptor options
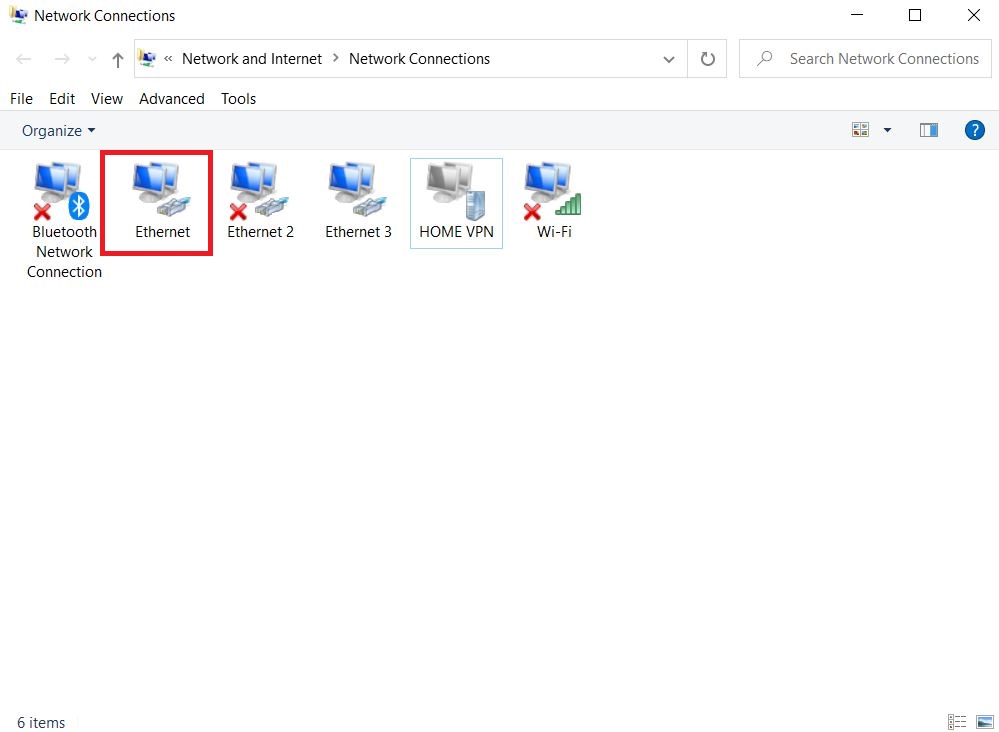
- Select the Ethernet adapter in use, coloured in Blue and NO cross sign
- Right-click the mouse, and select the property
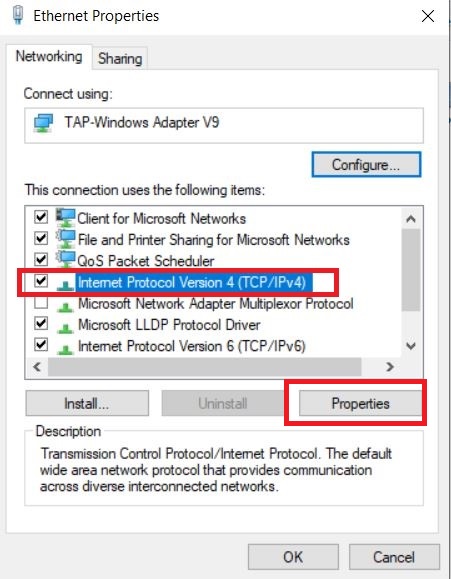
- Select the Internet Protocol Version 4 (TCP/IP), and click the properties again
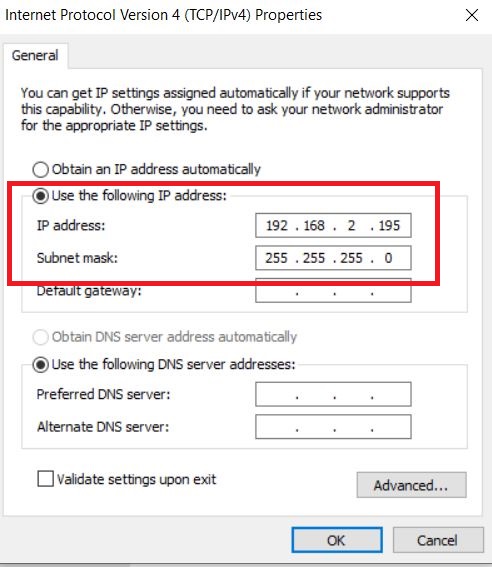
- Change your current settings to "Use the following IP address"
- Type the IP address you just created, for example, the address you just created, 192.168.2.195, the subnet mask is 255.255.255.0. You can leave the DNS server address in the blank.
- Click okay and close it
- On the same Ethernet adaptor, right-click the mouse, disable it from the top option, the ethernet adaptor will be grayed out.
- Enable the same adaptor, it will change it back to blue colour
Refer to the following images:
Part 2, Make the connection and upgrade the IP camera
- Connect the laptop to any of the POE ports at the back of the NVR, using the patch lead.
- If there is no empty port available, you need to temporarily take one of the cameras off from the NVR, but NOT the one you are upgrading.
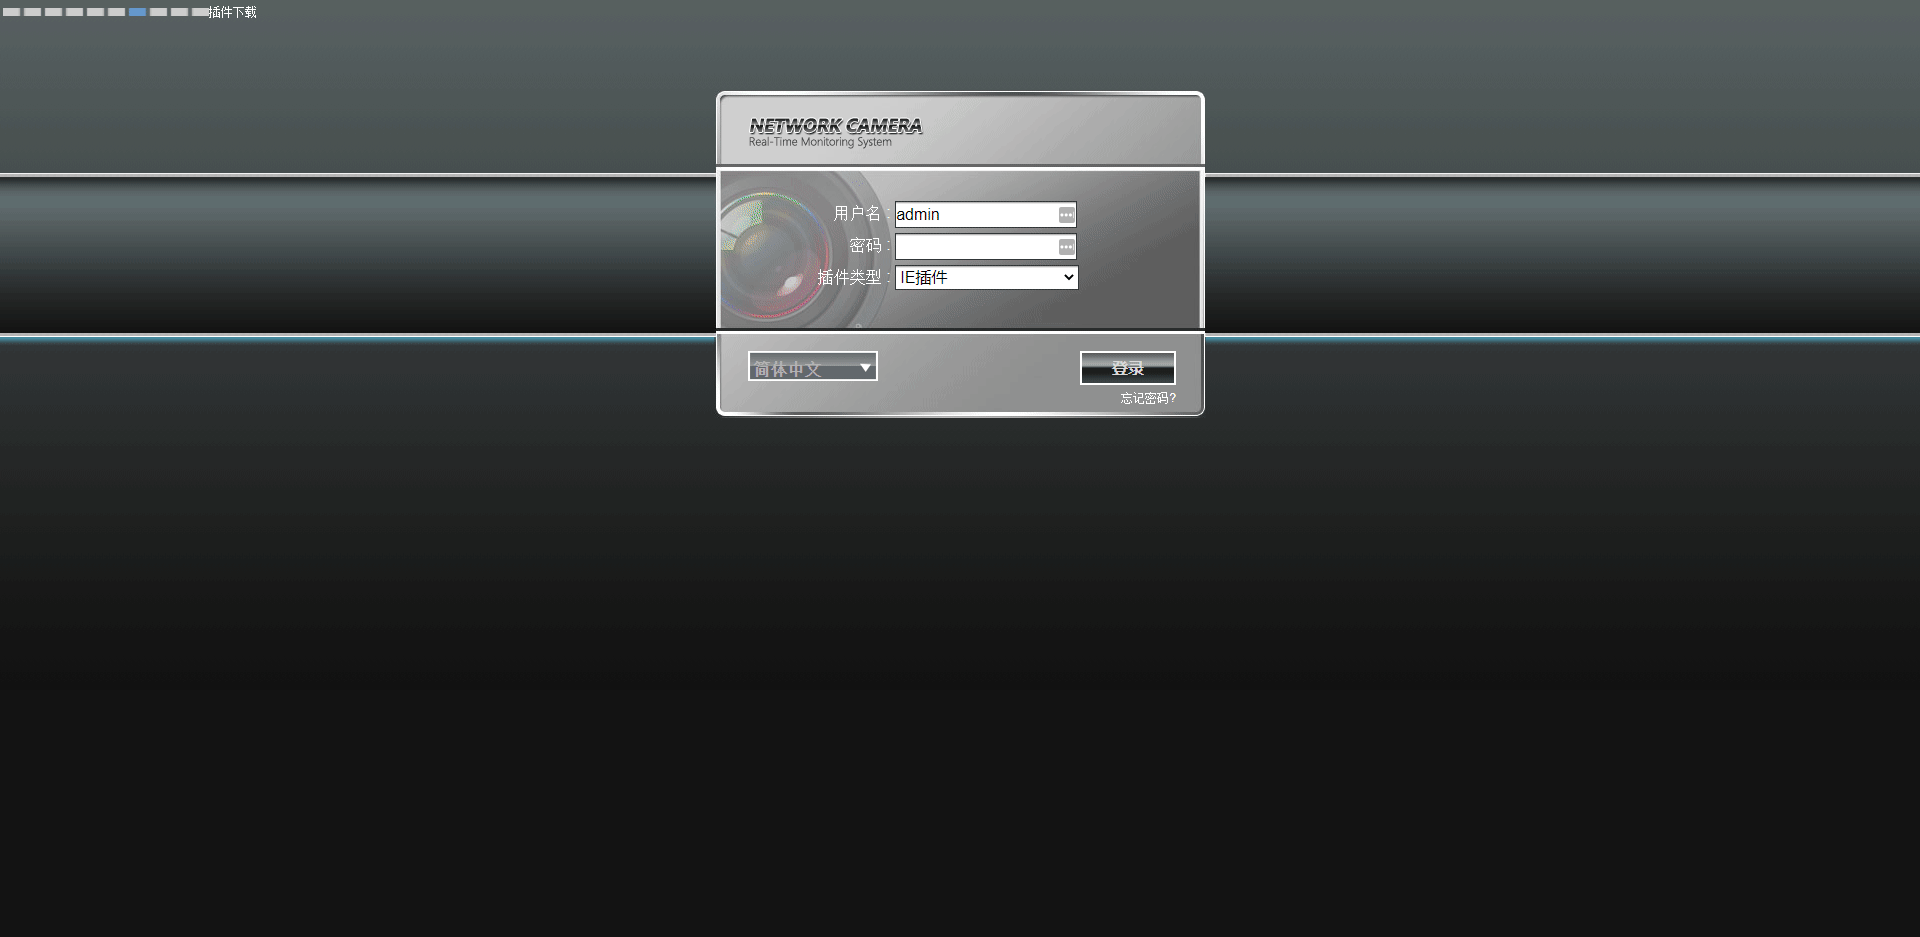
- On the laptop, open Internet Explorer or Chrome. type in that camera IP address for example 192.168.2.195. You will be asked to download the plugin. remember there is no internet access on your laptop, so you need to log in using the Flash Plugin instead of the login option.
- It is default no password for the camera
- There will be a black screen after you log in under Live, as no flash player is available.
- Go to setup and device information, record the firmware version number,
- Go to system update, browse the firmware file and update the camera.
- After the firmware update, you have to reconnect the camera via the browser, and you can log in to the camera to confirm if the firmware version has been updated.
- Confirm the camera picture is back to normal from your NVR monitor or your mobile phone APP.
Refer to this

Part 3, Disconnect the laptop and NVR, change the laptop network settings back
1. Reverse the network setting changes on Part 1, go to the network adaptor option, on TCP/IP properties, select "Obtain an IP address automatically"
2. Quickly disable the Ethernet adaptor and enable it again;
3. Turn the wifi back on,
Comments
0 comments
Please sign in to leave a comment.