To access and edit the email alert settings go to:
- System Setting from the top menu
- Network Setting from the left option
- Email Setting tab
First make sure you have put in your mail server settings correctly. Second, make sure your NVR has an active internet connection.
In the Email settings, you have the option of sending an "Attachment" along with the alert. This will send a screenshot of approximately the time the alarm was triggered.
In our testings, we have found Gmail mail servers to be more reliable than most others. We recommend setting up a special Gmail account to send alerts using the following details.
- Email Address: *yourfullemail@gmail.com*
- Password: *your GMAIL password*
- SMTP Server: smtp.gmail.com
- Port: 485 (Make sure the SSL box is ticked in the NVR email settings)
Troubleshooting
If the test email process fails, assuming all the network settings are correct, the cause could be your email account security settings.
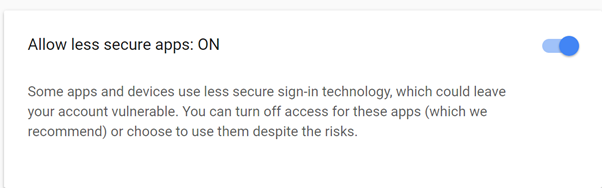
You may need to set additional settings with your email provider. In the example of Gmail, under your Google account settings, you may need to turn on the “Allow less secure apps" under “sign-in & security settings” or generate an app specific password for the DVR/NVR under “App password” if you have set 2-Step verification on your google account enabled.
Comments
0 comments
Please sign in to leave a comment.